PostgreSQL continuous backups are very powerful, if you know how to use them for recovery. There’s nothing else to do to be sure about that other than actually trying it. Personally, I see recovery as a single process with two possibly different outcomes:
- you’re recovering to the same state your cluster is/was in (because of a hardware failure, provider switch, …) - it’s more of a data migration, but you need your backup anyway
- you’re doing a point-in-time-recovery (someone dropped the wrong table, data got corrupted, …)
Both scenarios follow the same steps and differ slighty at the end.
- Stop the PostgreSQL cluster.
- Copy the current
PGDATA_DIR somewhere safe, just in case you screw up.
- Replace the
PGDATA_DIR with the full backup. If you start the cluster right away, it will boot to the last full backup state (in my case, missing a week of WAL segments tops).
General recovery
In this case, you’re trying to recover as far as possible. With previous steps done succesfully, the next follow:
- Copy all archived WAL segments created after the last full backup to
PGDATA_DIR/pg_xlog. These can be found with find -newer command run against the corresponding .backup file in your wal-archive/u/p directory.
- If your full backup strategy includes
recovery.conf file creation, you cane safely move it or remove it.
- Start the database cluster again. It is going to boot to the last working state.
If you’re about to migrate your data, you might be better off with simple pg_dump, pg_dumpall and pg_restore commands rather than using full backup/WAL segments combination.
Point-in-time-recovery
PostgreSQL’s PITR can help you restore your accidentally deleted/corrupted data. After the first three steps mentioned above, you should follow with these:
- Copy all archived segments created after the last full backup somewhere the PostgreSQL user can read them (
/your-wal-recovery-folder/ for example).
- Set up the
recovery.conf file properly. If you know something nasty happened at 2018-01-29 08:00:00, try to recover right to that point (or to any other, as described in the documentation).
restore_command = 'cp /your-wal-recovery-folder/%f "%p"'
recovery_target_time = '2018-01-29 08:00:00'
- Start the database cluster again. It is going to boot to the last full backup and then play all the WAL segments until the recovery target. Depending on how many WAL segments are about to be used, this might take a while.
Pitfalls
You don’t want to find yourself in the middle of the biggest database failure of the century just to find out your backups don’t work, and even if they did, you would have no idea how to use them. Or, even worse, there are no backups at all, because your backup strategy has been failing silently without a single notice for several months.
Tips
Try to recover from your backups once in a while.
I forget things and make mistakes. We all do. That’s why I built an ensemble that takes care of our database automatically. Nothing fancy, just a bunch of good old Bash scripts managed with systemd rathern than cron. Next time, I’d like to show you the code and walk you through our current setup.
Just a very few of my day-to-day work tasks can be accomplished without PostgreSQL. For years I’ve been a (power) user of this wonderful relational database, knowing almost nothing about how its internals really work. Faced with the need to build a backup and recovery strategy, I’ve recently read up a lot on this topic.
As I don’t find it very odd for a GIS person to be given such an extraordinary task (nobody wants to lose the priceless spatial data, right?), I hope this series might shed light on how to prepare and manage the backup/recovery process to those, who are up to such a task. I won’t be discussing backup strategies based on pg_backup tool, as those don’t offer neither continuous archivation, nor point-in-time-recovery (PITR) - those two features disqualifies it as CleverMaps production backup strategy.
That leaves us with taking periodic base backups combined with continuous WAL archivation, as described below.
Taking base backups
Archived WAL segments are worthless without a base backup they can be run on. It’s crucial to have consistent, periodic base backups to keep your data safe.
pg_basebackup takes base backup of PostgreSQL cluster. Nothing fancy. Gzipping the output folder once the backup is done is definitely a good idea.
pg_basebackup \
    --pgdata=/mnt/backup/base/backup_number \
    --format=plain \
    --write-recovery-conf \
    --xlog-method=stream \
    --label=${CR_LABEL} \
    --checkpoint=fast \
    --progress \
    --verbose
In our current environment, we take a base backup of each of our clusters once a week.
WAL archiving configuration
To properly set WAL archiving, several postgresql.conf settings has to be adjusted:
wal_level = replicaarchive_mode = onarchive_command = test ! -f /backup/wal/%f && cp %p /backup/wal/%f
Setting wal_level to replica writes enough information for WAL archiving. Turning on archive_mode will run archive_command each time a WAL segment is completed. archive_command might be anything from simple cp to rsync or aws s3 cp commands. It is absolutely critical that the command returns non-zero exit code in case of failure (including when a file with the same name already exists in your backup folder).
That’s it, after reloading PostgreSQL service, new WAL files should be copied to /backup/wal directory. The PostgreSQL process user (postgres usually) has to be able to write to the location.
Pitfalls
- If
archive_command fails, WAL segment remains on your database drive. If it keeps failing long enough, you’ll run out of space and the database will crash.
- If the backup location fills up, the above-mentioned happens as well.
- If you lose or corrupt any of the archived WAL segments, you won’t be able to pass through. That’s why you want to be sure that your
archive_command actually does what you think it does.
Tips
It might be a real PITA (fiddling around WAL segments included) to start a crashed database cluster with no space left. Keeping a dummy file in your pg_xlog location might save you a lot of trouble. Create one with following command. If you run out of space, remove this file and you get 300 MB for free. Don’t forget to recreate it after you start the cluster.
dd if=/dev/zero of=/path_to_your_database_cluster/pg_xlog/DO_NOT_MOVE_THIS_FILE bs=1MB count=300
There’s no need to keep archived WAL segments forever. They’re only needed until you take another base backup. Again, deleting WAL segments manually (or using find ! -newer previous_base_backup.tar.gz) might lead to accidental corruption of your backups. It’s much safer to use pg_archivecleanup pointed to your WAL backup folder, referencing the last sucessful full backup. Below is the script we use to keep our WAL backup folder of reasonable size, keeping the last three full backups.
# Find base_backup files not older than 3 weeks
# Sort by date
# Use the oldest one as a reference
OLDEST_BASE_BACKUP=$(basename $(find ${CR_WAL_BACKUP_DIR}/u/p/ -type f -iname "*.backup" -mtime -21 -print0 | \
xargs -0 ls -t | \
tail -n 1))

# Find all subfolders
# Except the u/p backup subfolder
# Execute pg_archivecleanup for each of the subfolders
find $CR_WAL_BACKUP_DIR \
    -type d \
    -not -path "${CR_WAL_BACKUP_DIR}u*" \
    -exec pg_archivecleanup -d {} $OLDEST_BASE_BACKUP \;
Functional backups are crucial part of a solid backup/recovery system. They’re still just one half of that system, though. If not tested thoroughly, they’re even less than that. More on testing backups and recovering from failures next time.
Good news, everyone! The AttributeTransfer plugin has been approved for QGIS Python Plugins Repository. It’s available via QGIS Manage and Install Plugins menu. Feel free to download!
Nevertheless, this post (the last in the series) covers QGIS plugin testing rather than my personal feelings about the aforementioned success.
Testing means mocking
To test a QGIS plugin you need to simulate the environment it’s meant to run in. And that environment is obviously QGIS itself, yet it’s not feasible to launch QGIS every time you run a test. Luckily, there’s a great QGIS mock that gets you going in no time (it completely slipped my mind where I found that piece of code though).
Testing means you need data
Every test is run again and again, which means it has to reset the data being used to its default state. This might be a PIDA if the test changes the data in an unpredictable manner.
Using QGIS memory layers you can prepare fresh data for each of your tests, effectively putting the whole data manipulation process aside.
Writing tests
Each of the AttributeTransfer plugin tests inherits from unittest.TestCase, which comes with several methods you might be familiar with from other languages: setUp() is run before for every test method, while tearDown() is run after each of them. Tests are defined as methods whose names start with the word test.
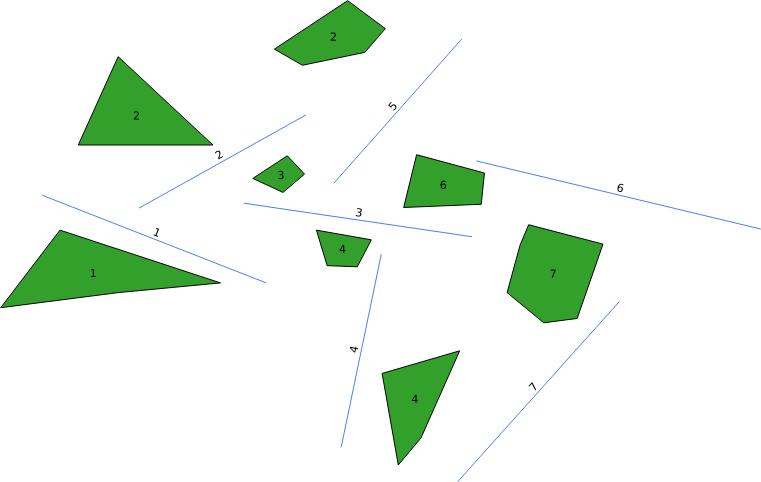
Each test should call some assertWhatever method that checks whether the test passed or failed. Here’s an example of such a test covering non-point layers.
#!/usr/bin/env python
# -*- coding: utf-8 -*-
# @Date    : 2017-11-18 18:40:50
# @Author  : Michal Zimmermann <[email protected]>

import os
import sip
import sys
import unittest
from qgis.core import QgsMapLayerRegistry, QgsVectorLayer, QgsFeature, QgsGeometry, QgsPoint
from utilities import get_qgis_app

sys.path.append(os.path.dirname(os.path.abspath(__file__)) + "/..")
from attribute_transfer import AttributeTransfer
from create_dummy_data import create_dummy_data_polygon_or_line

sip.setapi('QtCore', 2)
sip.setapi('QString', 2)
sip.setapi('QDate', 2)
sip.setapi('QDateTime', 2)
sip.setapi('QTextStream', 2)
sip.setapi('QTime', 2)
sip.setapi('QUrl', 2)
sip.setapi('QVariant', 2)

QGIS_APP = get_qgis_app()
IFACE = QGIS_APP[2]


class AttributeTransferTestPolygonOrLine(unittest.TestCase):

    def setUp(self):
        self.source_layer = QgsVectorLayer(
            "Polygon?crs=epsg:4326&field=id:integer&field=textAttr:string&field=intAttr:integer&field=decAttr:double&field=dateAttr:date&index=yes", "source layer", "memory")
        self.target_layer = QgsVectorLayer(
            "Linestring?crs=epsg:4326&field=id:integer&index=yes", "target layer", "memory")
        self.widget = AttributeTransfer(IFACE)

        registry = QgsMapLayerRegistry.instance()
        registry.removeAllMapLayers()
        registry.addMapLayers([self.source_layer, self.target_layer])
        create_dummy_data_polygon_or_line(self.source_layer, self.target_layer)
        self.widget.initGui()
        self.widget.vectors = [self.source_layer, self.target_layer]
        self.widget.editable_vectors = [self.source_layer, self.target_layer]
        self.widget.dlg.sourceLayer.addItems(["source layer", "target layer"])

    def test_text_attr(self):
        ATTRIBUTE_NAME = "textAttr"
        ATTRIBUTE_INDEX = 1

        self._test_attr(ATTRIBUTE_NAME, ATTRIBUTE_INDEX)

    def test_int_attr(self):
        ATTRIBUTE_NAME = "intAttr"
        ATTRIBUTE_INDEX = 2

        self._test_attr(ATTRIBUTE_NAME, ATTRIBUTE_INDEX)

    def test_dec_attr(self):
        ATTRIBUTE_NAME = "decAttr"
        ATTRIBUTE_INDEX = 3

        self._test_attr(ATTRIBUTE_NAME, ATTRIBUTE_INDEX)

    def test_date_attr(self):
        ATTRIBUTE_NAME = "dateAttr"
        ATTRIBUTE_INDEX = 4

        self._test_attr(ATTRIBUTE_NAME, ATTRIBUTE_INDEX)

    def test_existing_attr(self):
        ATTRIBUTE_NAME = "id"
        ATTRIBUTE_INDEX = 0

        self.widget.dlg.sourceAttribute.setCurrentIndex(ATTRIBUTE_INDEX)
        self.widget.dlg.targetAttribute.setText(ATTRIBUTE_NAME)

        self.assertEqual(
            self.widget.dlg.sourceAttribute.currentText(), ATTRIBUTE_NAME)
        self.assertFalse(self.widget.transfer())

    def _test_attr(self, attr_name, attr_index):
        self.widget.dlg.sourceAttribute.setCurrentIndex(attr_index)
        self.widget.dlg.targetAttribute.setText(attr_name)

        self.assertEqual(
            self.widget.dlg.sourceAttribute.currentText(), attr_name)

        self.widget.transfer()

        target_fields = [f.name()
                         for f in self.target_layer.dataProvider().fields()]
        self.assertIn(attr_name, target_fields)

        source_features = [f for f in self.source_layer.getFeatures()]
        target_features = [f for f in self.target_layer.getFeatures()]

        for idx, f in enumerate(source_features):
            self.assertEqual(f.attribute(attr_name), target_features[
                             idx].attribute(attr_name))


if __name__ == "__main__":
    unittest.main()
This part finally brings the whole source code of the QGIS AttributeTransfer plugin.
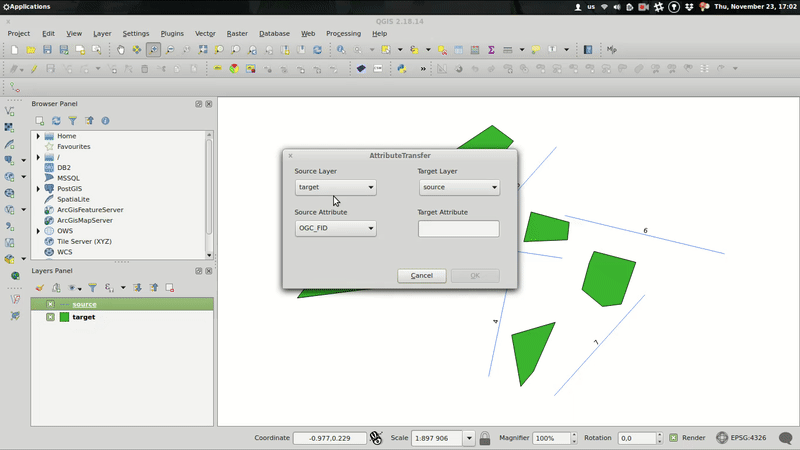
The plugin itself resides in the attribute_transfer.py file. When run() method is invoked, the QT form pops up with combos prefilled with available vector layers that support attribute editing.
Source and target layer combos are mutually exclusive, thus it’s not possible to transfer the attribute within the same layer.
Coding the plugin, I came across minor issues related mainly to the QgsSpatialIndex implementation. In the nearest neighbor analysis part of the series, the QgsSpatialIndex.nearestNeighbor method was mentioned. Yet, as I found out, this method only works with QgsPoint geometries. Those are impossible to get from QgsPolygon or QgsPolyline, though. What can one possibly do, facing such a misfortune? Well… draw a solution matrix.
|
point |
line |
polygon |
| point |
QgsSpatialIndex.nearestNeighbor |
QgsSpatialIndex.nearestNeighbor; layers have to be switched, e.g. source layer = line |
QgsSpatialIndex.nearestNeighbor; layers have to be switched, e.g. source layer = polygon |
| line |
QgsSpatialIndex.nearestNeighbor |
QgsSpatialIndex.intersects with QgsGeometry.distance |
QgsSpatialIndex.intersects with QgsGeometry.distance |
| polygon |
QgsSpatialIndex.nearestNeighbor |
QgsSpatialIndex.intersects with QgsGeometry.distance |
QgsSpatialIndex.intersects with QgsGeometry.distance |
Using the spatial index brings one more issue I’ve come to realize just after implementing the special comparison workflows for different geometry types. There’s a chance of finding the nearest feature using the bounding box that’s actually not the nearest feature. In that case, I chose to find the most distant vertex of such a feature and use it to construct the rectangle around the target feature. If there are any source features in such a rectangle, it’s very likely one of them is the real nearest feature.
Right now, I’m working on finding the nearest feature even if no bounding box intersection is found. Meanwhile, the plugin is being reviewed to be featured in QGIS Plugins repository. Fingers crossed.
I thought this was going to be the last part of the series. But how could one possibly claim the coding project done without writing tests? Stay tuned for the next episode.
After fiddling with QGIS Python console and implementing nearest neighbor analysis, I’m going to create a very simple GUI for the plugin at last.
While QGIS API docs took me few hours to grasp, the PyQGIS ecosystem knocked my socks off. Here comes the list of tools you should incorporate into your development process as soon as possible.
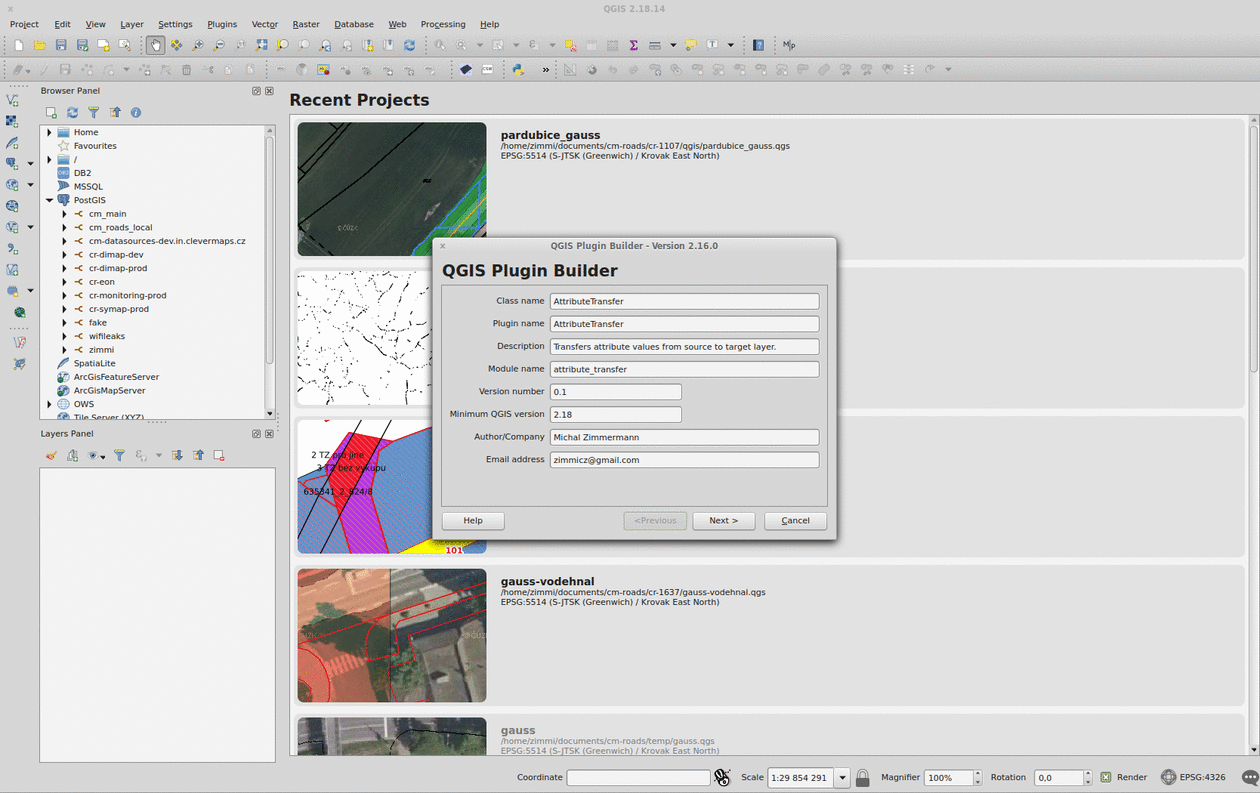
Plugin Builder
The QGIS Plugin Builder is a plugin created to create… well, other plugins. It gets you going in minutes and lets you code instead of setting up things you don’t want to be setting up. A definite must-have. Note you should put the plugin inside the QGIS plugins folder (defaults to ~/.qgis2/python/plugins) in Linux.
Remember to run pyrcc4 -o resources.py resources.qrc inside your plugin folder before you add it to QGIS.
Plugin Reloader
The QGIS Plugin Reloader is a plugin (possibly created with QGIS Plugin Builder) that lets you live reload your plugin while you code. No QGIS restarts needed. A definite must-have.
Qt Designer
Qt Designer comes with qt4-designer package in Ubuntu. It is tailored to design and build GUIs from Qt components that can be used within QGIS. Its drag&drop interface lets you prototype quickly.
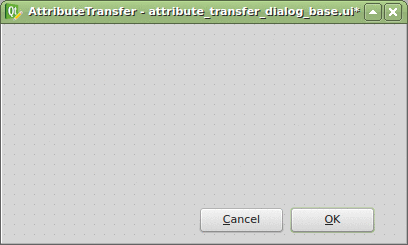
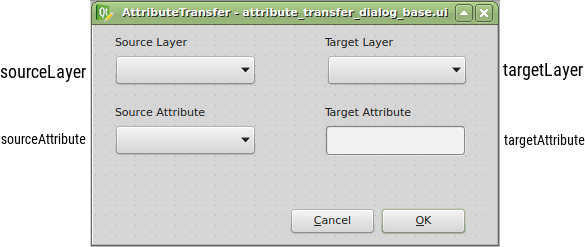
Thanks to the Plugin Builder you can load the attribute_transfer_dialog_base.ui file straight into the Qt Designer and adjust it to your needs.
It doesn’t take much, just one QLineEdit and a few QComboBox widgets. Those will be available in the attribute_transfer.py file as properties of the AttributeTransferDialog class.
The widget name can be customized in the right sidebar and I advise you to do so. I chose the following:
Once loaded with Plugins -> Manage and Install Plugins -> AttributeTransfer, the plugin is available right from the toolbar or Vector menu. It is missing the business logic completely, but I have this covered in the previous part.
All that is to be done is to bind those two parts together.