QGIS Plugin Development: Creating GUI with Qt Designer
After fiddling with QGIS Python console and implementing nearest neighbor analysis, I’m going to create a very simple GUI for the plugin at last.
While QGIS API docs took me few hours to grasp, the PyQGIS ecosystem knocked my socks off. Here comes the list of tools you should incorporate into your development process as soon as possible.
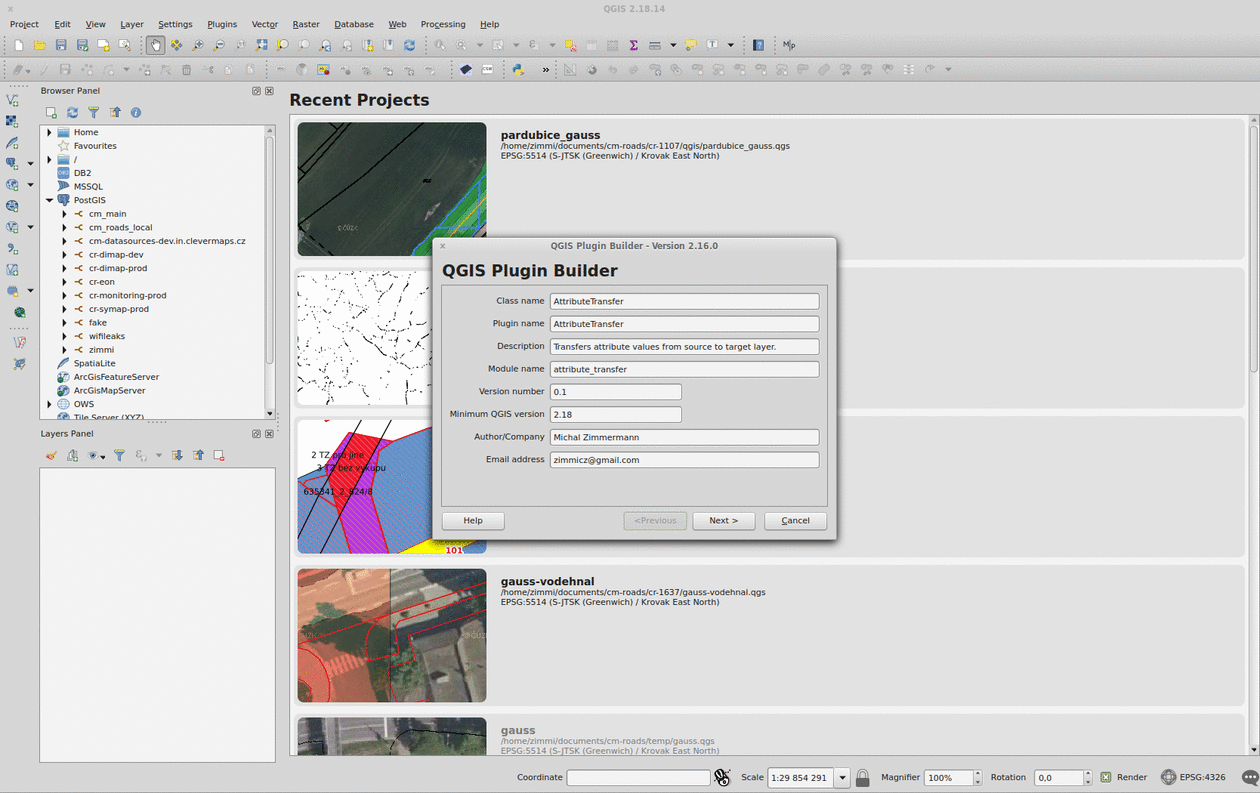
Plugin Builder
The QGIS Plugin Builder is a plugin created to create… well, other plugins. It gets you going in minutes and lets you code instead of setting up things you don’t want to be setting up. A definite must-have. Note you should put the plugin inside the QGIS plugins folder (defaults to ~/.qgis2/python/plugins) in Linux.
Remember to run pyrcc4 -o resources.py resources.qrc inside your plugin folder before you add it to QGIS.
Plugin Reloader
The QGIS Plugin Reloader is a plugin (possibly created with QGIS Plugin Builder) that lets you live reload your plugin while you code. No QGIS restarts needed. A definite must-have.
Qt Designer
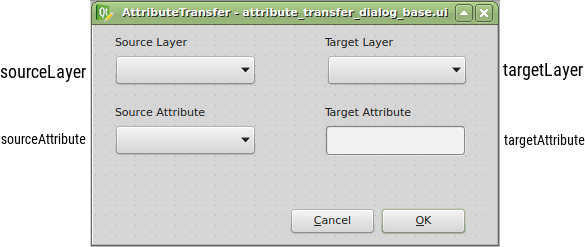
Qt Designer comes with qt4-designer package in Ubuntu. It is tailored to design and build GUIs from Qt components that can be used within QGIS. Its drag&drop interface lets you prototype quickly.
Thanks to the Plugin Builder you can load the attribute_transfer_dialog_base.ui file straight into the Qt Designer and adjust it to your needs.
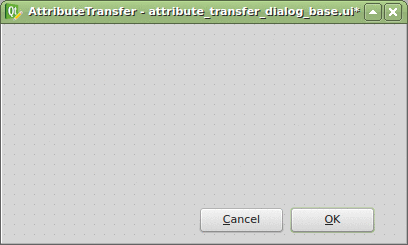
It doesn’t take much, just one QLineEdit and a few QComboBox widgets. Those will be available in the attribute_transfer.py file as properties of the AttributeTransferDialog class.
The widget name can be customized in the right sidebar and I advise you to do so. I chose the following:
Once loaded with Plugins -> Manage and Install Plugins -> AttributeTransfer, the plugin is available right from the toolbar or Vector menu. It is missing the business logic completely, but I have this covered in the previous part.
All that is to be done is to bind those two parts together.