PostGIS as a Mapbox Vector Tiles generator
PostGIS 2.4.0 was released recently bringing the possibilities to generate Mapbox Vector Tiles without any third party tools. I got a shot at it with Node.js and docker. Even if it’s not as straightforward as solely using ST_AsMVT, it still looks pretty great.
Docker container
There are no Ubuntu or Debian based PostGIS 2.4.0 packages as far as I know. As installation from source (especially considering GIS software) is always a bit risky, I prefer using Docker to stay away from trouble. The image is based on Ubuntu 17.04, has PostgreSQL 9.6 and PostGIS 2.4.0 installed. It exposes port 5432 to the host, so you can access the database from the outside the container.
FROM ubuntu:17.04
RUN apt update
RUN apt install -y wget less systemd
RUN touch /etc/apt/sources.list.d/pgdg.list
RUN echo "deb http://apt.postgresql.org/pub/repos/apt/ zesty-pgdg main" > /etc/apt/sources.list.d/pgdg.list
RUN wget --quiet -O - https://www.postgresql.org/media/keys/ACCC4CF8.asc | apt-key add -
RUN apt update
RUN apt -y install postgresql-9.6 postgresql-server-dev-9.6

USER postgres
RUN /usr/lib/postgresql/9.6/bin/pg_ctl -D /var/lib/postgresql/9.6/main -l /tmp/logfile start

USER root
RUN echo "host all  all    0.0.0.0/0  trust" >> /etc/postgresql/9.6/main/pg_hba.conf && \
    echo "listen_addresses='*'" >> /etc/postgresql/9.6/main/postgresql.conf


EXPOSE 5432
RUN apt install -y netcat build-essential libxml2 libxml2-dev libgeos-3.5.1 libgdal-dev gdal-bin libgdal20 libgeos-dev libprotobuf-c1 libprotobuf-c-dev libprotobuf-dev protobuf-compiler protobuf-c-compiler
RUN wget http://download.osgeo.org/postgis/source/postgis-2.4.0alpha.tar.gz
RUN tar -xvzf postgis-2.4.0alpha.tar.gz
RUN cd postgis-2.4.0alpha && ./configure && make && make install

USER postgres
RUN service postgresql start && psql -c "CREATE EXTENSION postgis"

USER root
COPY start.postgis.sh /start.postgis.sh
RUN chmod 0755 /start.postgis.sh

CMD ["/start.postgis.sh"]
start.postgis.sh file starts the database server and keeps it running forever.
#!/bin/bash

DATADIR="/var/lib/postgresql/9.6/main"
CONF="/etc/postgresql/9.6/main/postgresql.conf"
POSTGRES="/usr/lib/postgresql/9.6/bin/postgres"

su postgres sh -c "$POSTGRES -D $DATADIR -c config_file=$CONF" &
until nc -z localhost 5432;
do
    echo ...
    sleep 5
done
sleep 5 # just for sure
su - postgres -c "psql -c \"CREATE EXTENSION IF NOT EXISTS postgis\""
echo database up and running

wait $!
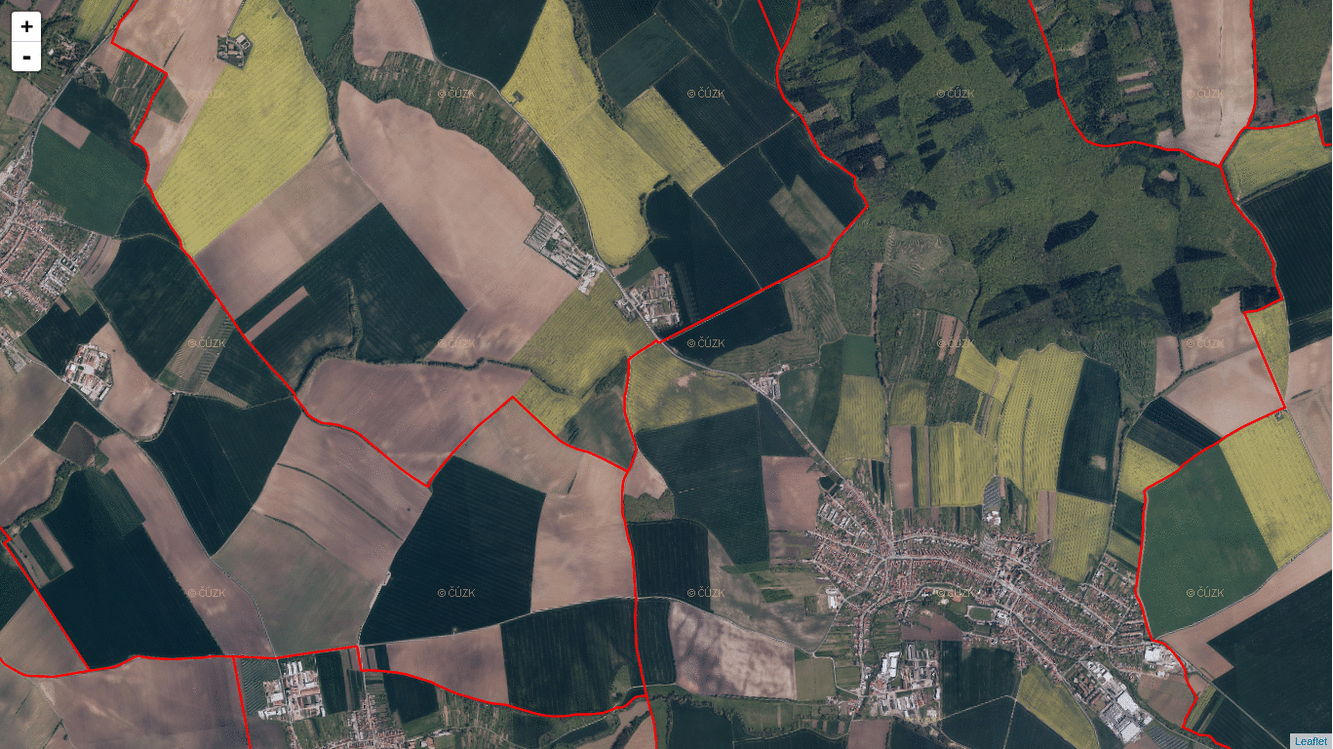
Data
I got a cadastre area dataset of the Czech Republic for testing, which contains ~ 13,000 polygons. The geometries should come in Web Mercator a.k.a. EPSG:3857 to work with MVT.
Vector tiles
I got a bit confused by the docs of ST_AsMVT and ST_AsMVTGeom. Especially the latter one took me a few hours to get it right. What is essential (I guess) about Mapbox Vector Tiles is that you have to abstract from the real world coordinates and start thinking inside the tile coordinates. What PostGIS does with ST_AsMVTGeom (and what any other MVT implemenation should do for you) is that it takes real world coordinates and put them inside a tile.
To make this work, you need to know every bounding box of every tile on every zoom level in a Web Mercator projection. Or you can use TileBBox procedure by Mapbox, if you wish.
The SQL query itself is pretty simple (this comes from an express route I’ll be discussing shortly).
SELECT ST_AsMVT('cadastre', 4096, 'geom', q)
FROM (
    SELECT
        code,
        name,
        ST_AsMVTGeom(
            geom,
            TileBBox(${req.params.z}, ${req.params.x}, ${req.params.y}, 3857),
            4096,
            0,
            false
        ) geom
    FROM cadastre_area
    WHERE ST_Intersects(geom, (SELECT ST_Transform(ST_MakeEnvelope($1, $2, $3, $4, $5), 3857)))
) q
When filled with proper arguments instead of placeholders, it returns a bytea.
\x1aa5dbd0070a047465737412e216120400000101180322d7160987913f8db38e01aa59160e2a010412012a0624060e001410420a1a00203b0a3914190e15085912010a0f0c0f06370804080a0e0e0234090e0
This can be consumed by a Leaflet map using Leaflet.VectorGrid plugin. To keep it short, the frontend code actually boils down to three lines of code.
var url = 'http://localhost:3000/mvt/{x}/{y}/{z}';
var cadastre = L.vectorGrid.protobuf(url);
map.addLayer(cadastre);
The server MVP is available as a GitHub gist.